–> Ferrous Metallography
The techniques employed in palaeometallurgyaim to determine the purity (presence of precipitates and heterogeneities) and the structure of metal, using a representative sample from an artefact. This is achievedby examining the size and morphology of the grains and the presence of different phases (distinct and homogenous forms of matter separated by its surface from other forms).
Observation allows us to generate hypotheses on the shaping, use and quality of an object. The object’s own history is part of a broader global context of metal processing.
For the most part the procedure is very simple and relatively extended, and comprises 4 stages:
- Choosing and collecting a sample
- Polishing
- Metallographic attack
- Optical and electronic observations
When the objects contain enough non-corroded metal to allow a significant metallurgical study, the samples are cut with a metallographic saw, which is made up of silicon carbide discs.
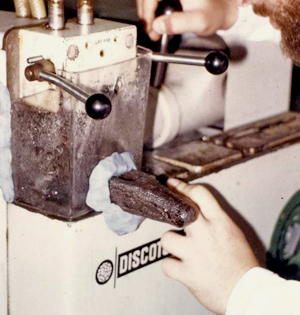
Heating the object excessively causes alterations to the metal’s structure, in order to avoid this a jet of cold water is used simultaneously.The sample is then immediately dried with alcohol and kept in a desiccator. This stops the surface being altered due to humidity.
The precise location that the sample is taken from on the object changes according to the aim of the investigation. Occasionally, when the sample is too small, resin has to be added which must be of an equivalent thickness and resemble the sample as closely as possible. If the resin is too soft it compromises the surface’s uniformity during polishing. It must also be resistantto attacking reagents,and not conduct electricity. This prevents polarisation during chemical attacks if the sample is to be viewed under a metallographic microscope.
Polishing makes the sample’s surface smooth and reflective, like a mirror. It is divided into three phases:
- Grinding with abrasives
- Polishing
- Completion
The first two phases eliminate the superficial structures that have been distorted during the abrasive sawing process. The abrasive used (silicon carbide, aluminium oxide or diamond) decreases in size progressively throughout the process. By placing the sample on the disc, it removes the disturbed areas or ‘dermis’ but creates a new one that is proportional to the size of the abrasive grit. Therefore,by using progressively smaller and less coarsegrains, the superficial hardening is gradually eliminated without becoming detrimental to the attack’s success.Because the structures being observed are microscopic, the quality of work and the absence of any previously existing scratches must be verified through a metallographic microscope.
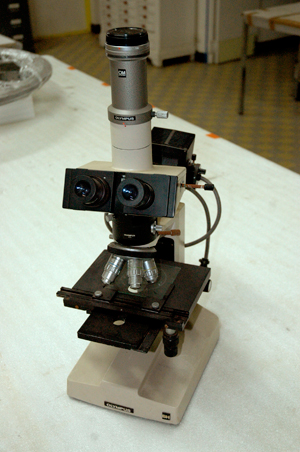
The attack reveals the internal structure of the metal. The reagents are chosen depending on the composition of the metal. Iron, steel orcast iron, are attacked with Nital, 1-5% nitric acid in ethyl alcohol.
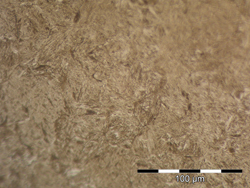
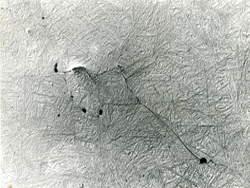
For different research, other acids or alcohols, for example oxalic acid, can also be effective. Nital is well adapted to finding the carburised zone on the sample’s surface. During the attack (a matter of seconds), dimpling differentiates the phases that are the most easily attacked (grain boundaries, zones that are less cohesive). Otherwise, in the same phase, the speed of corrosion varies according to the crystallographic orientation.
The observations carried out on the samples are either macroscopic or microscopic. They can be completed through mechanical tests such as measuring microhardness.
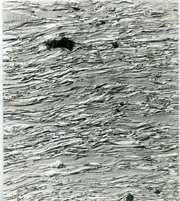
The macrographic examination gives different indications, which are important for interpreting what sort of treatments the metal underwent as well as its chemical or physical heterogeneities. For example:
- Solidifying the raw material casting (structure, size and grain orientation)
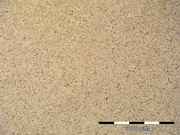
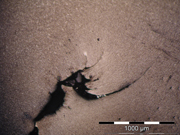
- Irregularities in the chemical composition (sulphur distribution, presence of slag and gas bubbles)
- Mechanical treatments: the alignment of the grains and the inclusions (material trapped inside a mineral during formation) can be seen, as well as revealingthe direction the metal was worked in. They also elicit the regular alternation of areas that are more or less pure, fibres…
- Thermal and chemical treatments: quench hardening (heating metal then plunging in water), fayalite (black or brown iron-rich mineral), thickness of the hardened or nitrided layers
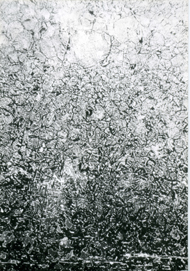
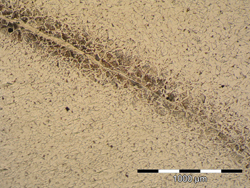
The micrographic examination reveals the alloy’s internal architecture. It clarifies the size, the shape of the metal’s constituents, their distribution, if there are any faults such as bubbles, microscopic breaks, cracks or inclusions.By measuring the microhardness one can locate and identify the various components. The test uses a punch called a penetrator that is applied to the surface of the sample with constant force for a certain period of time; this creates an imprint, the depth of which is inversely proportional to the hardness. By measuring the length of its diagonals, its value can be calculated at different points according to a conversion table.
Some of the photos were taken by LC2R with help from the Institut des Sciences de l’Ingénieur de Toulon et du Var, while another was taken by the Université Technologique de Compiègne.
Translation by Christabel Sakkalli


